Monday, November 10, 2014

Tolar Country Christmas Craft Fair

    On Saturday, November 8th I was able to take part in my first craft show. I got up at 6:30 am to pack up the car and then drive to Tolar with my partner, Alice. We had a long day with harsh wind and low attendance. However, parts of it were fun. I enjoyed meeting fellow crafters and talking about our various hobbies.

   It was also fun getting ready for the craft fair. I didn't get much crocheting in the month I had between signing up and the actual show. School was way too busy for that. However I did get some of my Pinterest pins out of the way. Alice and I like to drink wine on occasion and a recent night with several friends led to a few bottles being in left in our possession. I decided to break out the chalk board paint and some old spray paint.

    I really liked how they turned out! Chalk board paint and I were quick friends and I have loved using it since I bought my first bottle. It was a little difficult to do on the glass bottle because the paint didn't want to stick. Overall, I think both of them turned out well. The reddish brown bottles were spray painted. Those were a bit quicker, but I had difficulty getting the coats even. There are still some streaks. They just add to the overall feel. I also wrapped some light brown hemp cord around the necks. I need to remember to buy some fake flowers- these would make a great vase!


    A friend of ours came over to help with some last minute keychains. We were working on snitch keychains. Alice was making new ones, while I updated some older ones we had zooming around. It's interesting to see how styles change. The new ones came out looking very geometric. We managed to sell two. Our friend, Landrie, decided to go in a different direction. While messing around, their bit of clay turned into a well formed Nautilus. They were so cute! Since Landrie is a little young for their own Etsy, these will be sold in my store in the future. All proceeds (minus Etsy process fees) will be theirs. There are talks about Nautili earrings!

    We also made painted some old wands we made a while back. Nothing too fancy, but they look nicer with some color. One of my fellow crafters bought two for her friend's kids. They seemed to have a lot of fun swishing them around!
    Unfortunately the show wasn't much of a success for us. The wind was pretty bad. One poor woman's canopy was broken and her stuff ended up flying everywhere. She ended up having to leave two hours after the show started. I think a lot of the people opted to stay inside with the other vendors. The wind also kept messing up my display, so when people did come by, my wares were a little askew. I did manage to make my booth fee back!

    I met up with another Etsy seller that made the fair worth it. She gave me some great advice on pricing, displays, etc. She even turned me onto a few local shows coming up. One's on my campus! She was really friendly and I look forward to meeting more people like that at future fairs.

   My display wasn't too fancy, but you  can see more of my pictures on my Facebook. I hope to make enough at more shows to slowly afford more fancier display items.


    Thank you for reading! Wish me luck at future shows.

Happy crafting,

Bertie


Thursday, October 2, 2014

My time in the Mad Crochet Lab

On September 17th, I was part of a group of 20 crocheters invited into the famed Mad Crochet Lab. We were to have two weeks to fix a problem plaguing a large portion of the population.

It seems that many were missing their fun gene and went onto become grouches, sobs, and not so fun to hang around anymore. But how were we to fix that? We didn't know how to replicate the fun gene. Hell, we didn't even know what it looked like!

We did discover what happened to the genes. It would seem that some uneducated gnomes took to wearing them as jeans and rendered unusable to their human hosts. It took a lot of work isolating the genes  without  having to see gnome butt. However, we accomplished it!

It took a lot of work and time. To be honest, I slacked off until the last minute so many of my fellow cro-scientists carved my way. Sadly, school and my day job got in my way of actively working on the experiment. Darn double test days. :/

We also lost some of our colleagues a long of the way so only 17 of us remained at the end.

To really get a sense for how our experiment went, view the official Mad Crochet Lab report.


I ended up discovering an Austrian mountain gene gnome. It's a very unique strand and was a little trickier to isolate. Those skinny jeans were tiiiiight! Luckily her apron kept her safe from many of the chemicals used in the lab.

We were allowed to take our little gene gnomes home with us after the experiment. My little GG, as I've come to call her, has found a nest of her own. 

Overall, I enjoyed my time spent in the Mad Crochet Lab with my colleagues. A lot of us were in good humor and it was in no way a 'serious' environment. I'm happy to know I will be invited back for another experiment and I eagerly await that chance. Mad is such an awesome person to work with and knows how to entertain a group. I'm really glad I signed up for this opportunity.

I think she might be working on releasing the pattern for the gnomes on her website. When that happens, I will link ya'll through my Facebook page.

Until then, happy crafting!
Bertie

Thursday, September 4, 2014

#ThrowbackPatternThursday

Hello everyone! Taking my idea from last month with Donatello, I have decided to revisit another old pattern that I found when I was just learning to crochet.


These are "Pop Tart Cats." I made them for a feline loving friend four years ago for her birthday. Honestly, most of my crochet went to friends as gifts so you will be reading that story through out the #Throwback project.

They're cute and lovely, but their pastry needs some new filling. I decided to do something new this time around and give them more of that classic Pop Tart look. Think Nyan Cat, but no rainbows and song.

The first one I'm working on is "Oreo Cookie." The other one will be strawberry "flavored." I'm excited to see how these will look fresh from the toaster!

Have you gone back to redesign an old pattern, readers?

Happy hookin!
Bertie

Friday, August 22, 2014

#Pattern Revists 1

I've been crocheting since 2009/2010 when I found an extremely helpful book in the high school library. Crochet became my go to for present making. Birthdays, weddings, Christmas, you name it.

Around May 2010, I crocheted my friend Anaiza the four ninja turtles for her birthday. Yeah, we're a little old for dolls, so what? They were ooo'd and awwwww'd over and (in my opinion) won the best gift. I was really proud of those dolls.


Now, looking back at the pictures in my craft album, I wonder how much I've improved. Certainly my shapes have gotten better and I no longer use googly eyes as often.

Yesterday, I decided to return to the pattern that I used to make these dolls. This was originally posted by underthemountain on craftster. Find it here. It really is a wonderful pattern. I noticed right off that I was able to read it better and go a little bit faster.

I only made one doll. It took about 5 or less hours for me to complete it. And it turned out waaaay better than these four.


It's really cool to be able to use the same pattern and have it turn out differently years later. I'm glad to see improvements in my skill.

I will probably be doing more of these as I have a lot of patterns that I would like to retry now that I have more experience.


If you love this doll as much as I do, you can pick him up here for $15.

Saturday, June 21, 2014

New life

I'm currently in the process of painting my living room. When I moved in almost two years ago, I was greeted with cracking white paint on the walls and an orange door. I wasn't in the market for glamor. However, I've been given an opportunity to change up my living space. No longer stuck in suffocating white, I'm relaxing in a light, sage green and wanting to be surrounded by life. Still a couple years away from starting a family, though.


Going with the easier route of decorating my living room with nature. It makes me really excited since I have two DIY ideas that I'm currently working on. One is a daisy chain motif that I saw here. I can see it so plainly hanging over my couch.  My second idea is centered around the yarn wrapped wreaths that are all over Pinterest.

When you have a lot of yarn like me, you constantly think of ways to quickly use up the stash. I've been wanting to make a wreath for the longest time, but haven't really had the inspiration. All the wreaths I've seen are pretty, but not for my home. Since I decided to go with the nature theme, it was easy to come up with what I wanted.

I bought a flora craft wreath at Walmart after my shift and started digging through my stash drawer. I chose a dark brown, light blue, and green. It was fairly easy to get started, however it is time consuming. Speaking in Netflix terms, I was able to make it through an episode of Leverage, The Hunchback of Notre Dame, and begin Medium.


I really like how it came out and excited to see my vision enter the 3D world. The base is supposed to represent the sky and a tree. I wrapped another strand of green around the brown part and plan to add small crocheted leaves of the same color. Also adding more embellishments like a bird, sun, and some flowers.

Can't wait till I'm sitting in my perfect living room with my honey bunny. <3 I'm not really sure how to voice my excitement over this in a way that is not happy babbling. This fresh coat of paint has really made my mood soar!

How do you use your crafting/DIY spirit to decorate your home and really make it your space?


Monday, June 9, 2014

Onigiri Adventures!

Recently I listed a set of three rice balls. They're fun and perfect for playing restaurant. Posting them inspired me to make my (edible) onigiri!

I live in semi small town, so I was a little worried about finding the basic ingredients. According to a friend who joined me in this adventure, our Walmart only recently starting carrying rice wine. I had a hard time finding some affordable sushi rice because of how the store organizes items.

Thankfully, rice balls don't take that much to make. All the recipe I found here called for was sushi rice, seaweed, and a choice of filling. I chose to use salmon, chicken, and octopus.

On Saturday morning, I got up early to go to the park to exercise with some friends. Afterwards, we all came back to my place to make rice balls and stir fry. It was pretty fun though none of us could really make the ball thing work. The recipe said to make sure to wet our hands.....that was kind of neglected. So most of the rice ended up on our hands. It was also hard to keep a ball formed, even though the rice was pretty sticky.

Rice glove!

Sooooo......we turned it into poor kid's sushi.


They tasted really good and went well with the veggie stir fry! Perhaps next time we'll do it a little more by the book if we want actually rice balls. Till then, I found a nice little way to fix my sushi cravings and add a nice side to the reg stir fry dinner.

Readers, do you have any experience with making your own rice balls? What fillings are your favorite?

Bertie

Friday, June 6, 2014

6/6/2014

Happy Etsy Craft Day, everyone!

If you follow my Facebook fan page you might have heard that I had been planning a party for today. Unfortunately scheduling with my work did not work out and I was derailed in some of the planning process due to my depression. Hopefully, everyone has a great day full of crafting anyway!

I'm currently working on recreating the dress I had made for my Maria doll. A friend, who has ordered from me twice before, fell in love with the ruffley dress and wanted it for her latest doll. It's definitely going to be a learning experience since the original outfit is a physical part of the doll and must now be made removable. I can make a simple dress, so the skirt and torso part will be a breeze. However, the off the shoulder ruffle and sleeves will need some thinking.

I'm excited to see the finished dress though since I'm using a lovely dark green and the doll will have a mass of curly red hair to really set it off!

Original Dress

Yesterday, I made a trip to my favorite store, Micheals. My bank account isn't completely empty, but I'm really excited to get into my purchases! Since my interest in embroidery is expanding, I picked up some transfer paper because my drawing skills have really declined. I also picked up an iron transfer pen to make my own transfers from illustrations I have around the house.

For my first transfer project, I am going to use a white string knapsack that I also bought at Mike's to make something for myself. Which is completely unheard of. I can't decide if I want to make it something to advertise my Etsy with or to just have it be all queer and angry.

I also bought a cross stitch apron pattern to make for my sweet Alice. It has three cupcakes and says the "Sweet Life." She seems excited by it, so I'm eager to start it so she'll have a cute apron to wear. She currently has a mustard yellow apron that I've been saying I'll embellish, but haven't been inspired.

So, with all these things to do, I've decided to add more to my weekend projects. Today, I listed a set of three crocheted rice balls for play food. This has inspired me to make actually onigiri! The recipes have assured me that it isn't too hard, but I'm still very excited!

Like a lot of modern American teenagers, a lot of my exposure to Japan came through anime and manga. Rice balls stuck out to me because of how common they were in any book I picked up- but they were legit customizable! I plan to make them for the first time ever on Saturday, so look out for a blog post covering them in the next few days!

This is going to be an interesting/busy week. And Orange is the New Black is back today!!!!!! This is a great Friday!

Happy crafting (and Netflix bingeing!)

Bertie

Sunday, June 1, 2014

Burgers are good, burgers are great

It's summer time, folks! Time to wheel out the grill and show your buddies who makes the best burgers in your area. Kids can have the pool and the sunshine, you have what's most important- burgers.

Burgers come in all shapes, sizes, and flavors. You can have a quarter pounder with cheese, a beltbuster with guac, or a turkey burger with chipotle mayo.

I love burgers. I love turkey burgers. Bean burgers. Veggie burgers. Chicken burgers. Nothing beats a solid patty loaded up with lettuce, bacon, tomato, and sandwhiched between Brioche buns. (They recently started serving one of my favorite chicken sandwiches on those at Jack in the Box. Soooo much goodness.)

 I recently made a burger similar to this one. Just gonna make a few changes to the ingredients list.

Fiesta Turkey Burger
  • 2 large clove garlic, minced
  • 1 small white onion (though I would have liked to use 1/2 of a red onion)
  • 2 tablespoons minced red bell pepper
  • 1 tablespoon minced green onion
  • 1/4 of a cup minced fresh cilantro
  • 1 tablespoon of chili powder
  • 1 teaspoon ground cumin
  • 1 teaspoon oregano 
  • salt and pepper to taste
  • 2 slices pepperjack cheese, cut into quarters 
Literally the best burger ever. I had brought it for lunch at work and I could not wait to eat it!

Speaking of burgers, I just put up a crochet version of yummyness in the shop. Feel free to show off your love for burgers in a healthy way or use this as an opportunity to teach your kids about what makes a good burger so tasty.

https://www.etsy.com/your/shops/xBlueUnicornCrafts/stats/listing/191489049#
Happy grilling!

Bertie

Thursday, May 15, 2014

Update!

I'm finally done with all things school related for the semester. Got out pretty good- one B amongst a sea of A's! :D Even managed to dig myself out of my project hole.

Got my Mother's Day stuff done:
This is for my Mother in Law.

This is for my Nana. Used her favorite bible verse

My mother is pretty hard to craft for so I took the easy way out with flowers and lunch with my sister in tow.

I did a patch for a friend to get some practice out of the way. I found a 10 pack of rectangular patches for a $1 at Wal Mart. Didn't know what to put on them until her!
"Octocutie" patch!

Still got a few projects I'm working on. One is Gunter from Adventure Time! Hopefully he'll be done by the weekend. Here's what I got on him so far.
13" on SC in black -.-
There's some more needlework in my hoop. This is meant for a friend's house warming- so hopefully I'll get it done by tomorrow. I need to add a frame of flowers and birds.....need to get an actual frame too.....
We're humorous. ^^
So even without school, I'm a busy little bee. Thankfully, I actually enjoy this. I'm looking forward to doing a lot more cross stitch this summer!

Monday, May 5, 2014

30 Day Crochet Challenge: Day Six

Perhaps this challenge was too much for me? Gotten a little behind, so let's start with day six and I'll answer the others at the end.

 Day 6: What is your favorite piece that you’ve crocheted?

That feels really hard to say. It seems that I always am picking a new favorite with each pattern I complete.


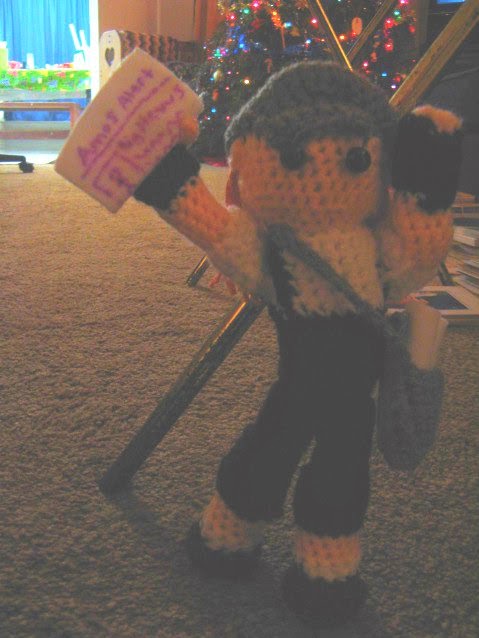
 It's between these two. They were custom designs by me and some of my first attempts at crocheting my own patterns. The newsboy was for my news paper teacher and Prince Gumball was for a friend.

Day 3-5

Day 5: How long did it take from the time your learned how to crochet, to finish your first project?
  
Not long actually. I picked it up really quick and jumped into amigurumi immediately.

Day 4: How did you learn how to crochet?

I pretty much answered this in Day 1

Day 3: Do you have any other WIPs (works in progress)?


Don't remind me! xp

Sunday, May 4, 2014

May the Fourth be with you!

This is a little late, but I decided to compile a list of Star Wars crafts!

  1. Star Wars Pillow Cases
  2. Quick Light Sabers
  3. It's a trap! Ackbar Puppet


Sadly, I was busy at work today to do much Star Wars type celebration today. :( Hopefully you were able to have a great day and you still have an hour left to do one of these crafts! (However you do not need a special day to get your geek on.)

Tutorial- How to put hair on a crochet doll

Do you love making dolls, but don't know how to do hair? There are many different ways out there, but this is how I like to do hair.

This is a photo tutorial I took while adding hair to a recent order. Here's our model:


Step 1: Choose your hair color! I chose a dark brown sports weight yarn. This tutorial should work with any weight yarn. However, when making the wig cap, I suggest you use a medium weight version of the color you choose.  

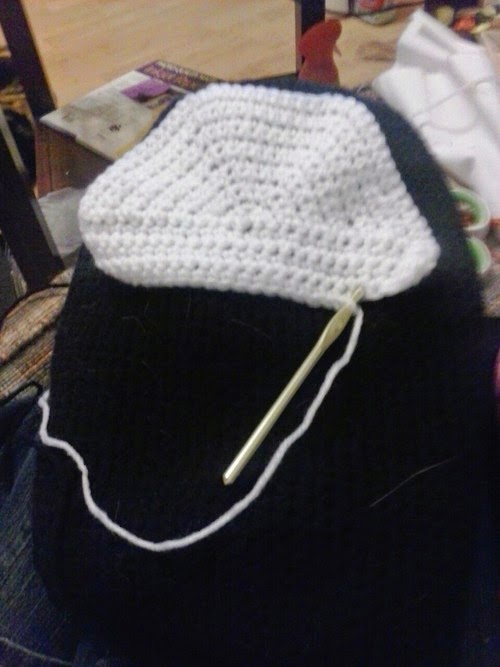
Step 2: We will start making the wig cap. In this version, I am using an H hook since that is what I used to make my doll. An easy way to make a wig cap is to follow the directions you used to make the doll's head. Keep crocheting in the round until you're done increasing and then do one round of single crochet.    
    
Started out with Ch2 and Sc 6 in the first chain


Be sure to match up the cap with your doll's head as you go along, just to make sure.

It's like making a little hat for your dolly. :)


Step 3: Once your done with the wig cap, finish off and leave a long strand of yarn for sewing. Sew the wig cap onto your dolls head. You can leave the left over yarn as your first strand of hair.   
     
  Step 4: We will be making strands of hair. The easiest way to do this is by wrapping your yarn around a long, sturdy object. This can be a piece of cardboard, a DVD case, or a thin book. It only needs to be as long as you want your hair to be. Remember: the thickness of your object will contribute to the length of your hair. Wrap the object as much as you want. When you're satisfied, cut the yarn off the book.
  
   
I chose my text book for Tech Writing! :D Anyway, wrap your yarn around the book as much as you want. I had to do this a couple of times to achieve thick hair. 


 Step 5: Take one strand of the hair and loop it in half.


Like so.

Stick your hook through the stitch where the hairline and the skin tone meet. This is where we'll be starting with the hair. With your hook, pull the looped yarn through the stitch- BUT DON'T PULL IT ALL THE WAY. Wrap the tail around the hook and pull it through the loop already on the hook. This will make a knot that will anchor the hair into place.


Continue to do this all the way around the hair line. Start and stop where you want the bangs to be. You can go all the way around to cut bangs later. It's your choice!

 If you feel this is the look you want for your doll, then feel free to stop! If not, then continue to add hair around the wig cap as you just did. If you do not want to do the full head of hair, you can "cheat" by adding a row in the middle of the cap and than another row or two around the top of the cap. Since I was instructed to add as much hair as possible, I added hair to every single row of the wig cap.

A thick, lustrous head of hair!
 Step 6: Hair cut! The yarn won't be even when you're done. Also this is your chance to give your doll some style~

Finished!


 I hope you enjoyed this tutorial and found it helpful. If there are any questions, please ask! This is my first tutorial.

Happy crafting!

Bertie